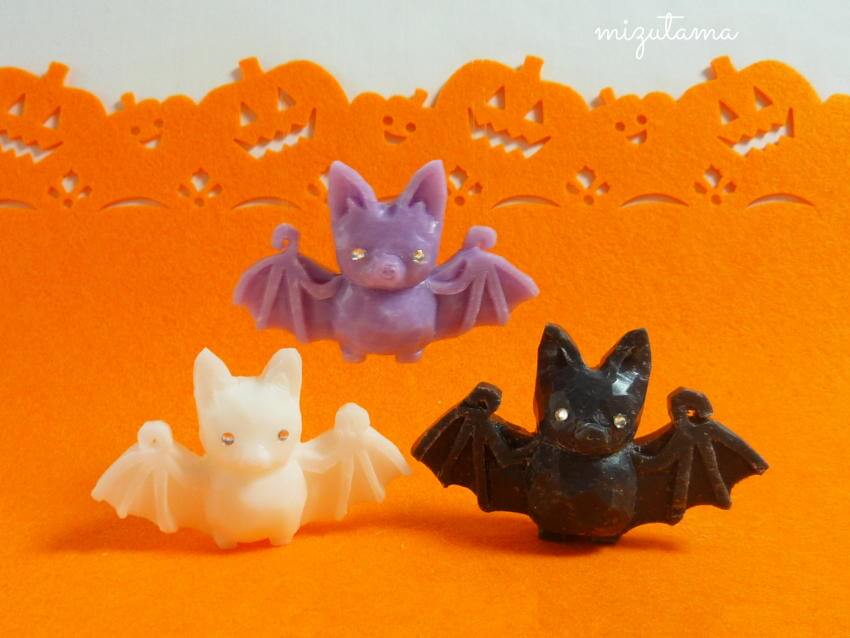
Size: 9.2 cm (3-5/8") x 6.2 cm (2-1/2") x 2.9 cm (1-1/8")
Weight: 135g (4.76 oz)
🎞️
Instruction video
❔
Instructions
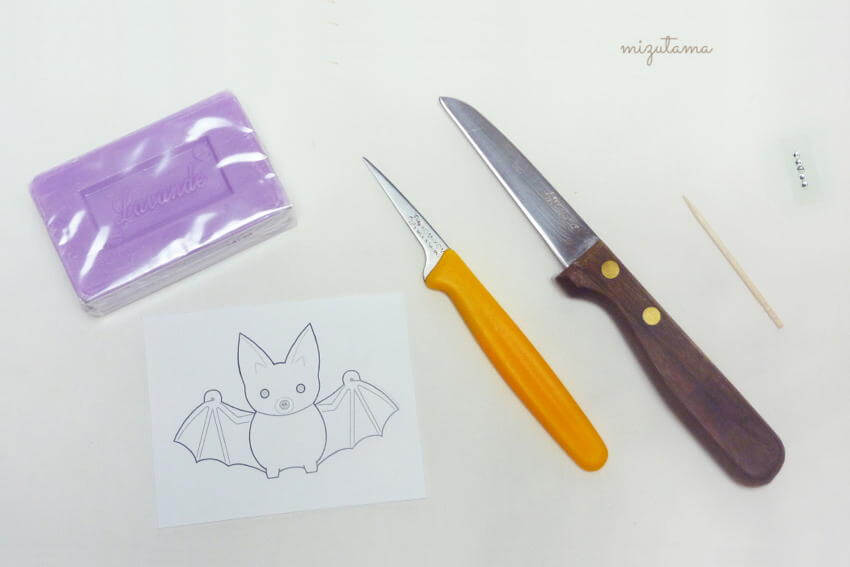
Carve a bat
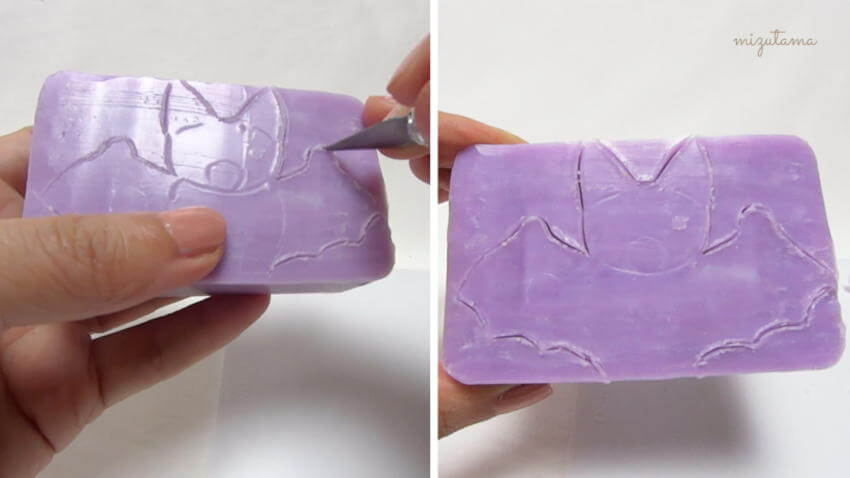
1.1 Thinly cut off the top and the bottom of the soap to create flat surfaces. Cut out the bat template, then trace the bat shape onto your soap with a toothpick.
1.2 Lightly cut along the outline of the bat with a craft knife.
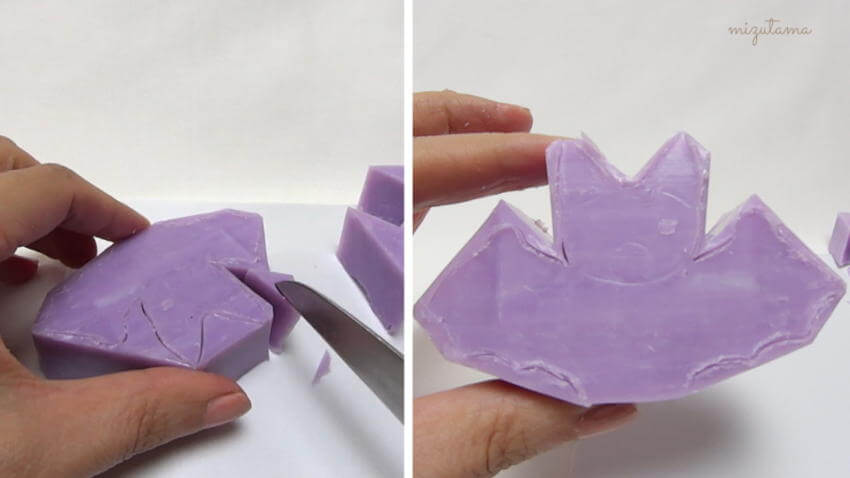
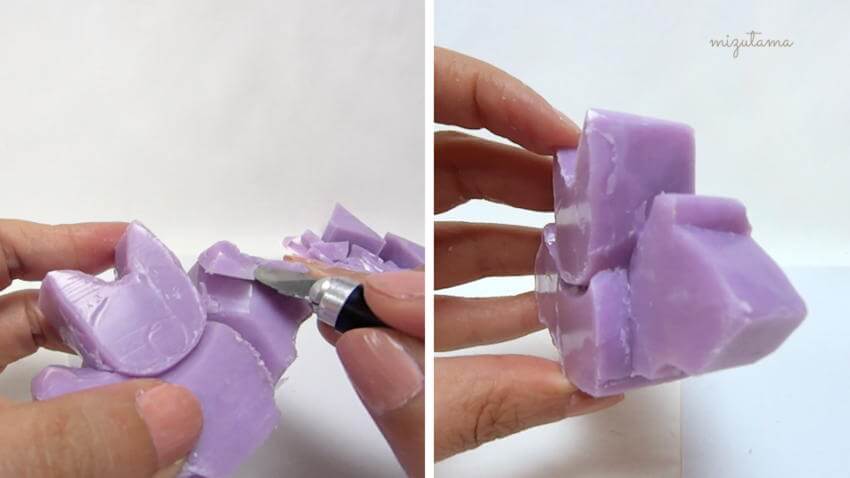
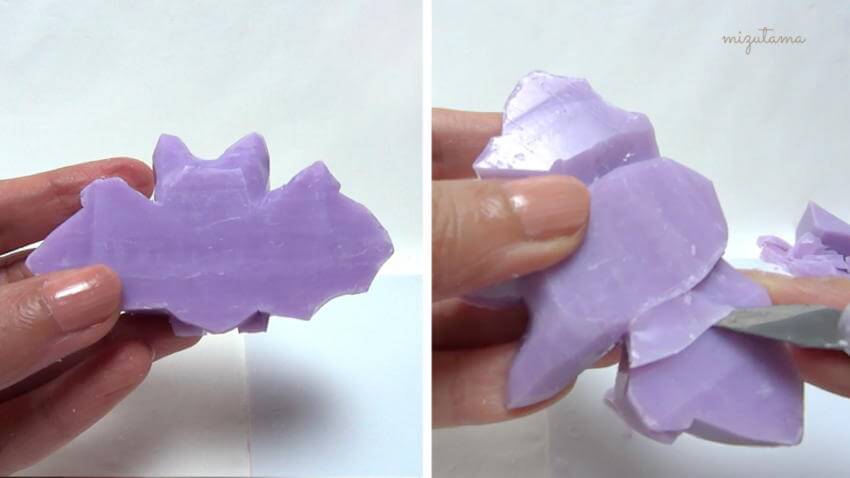
1.3 Roughly cut the bat shape out of the soap with a paring knife.
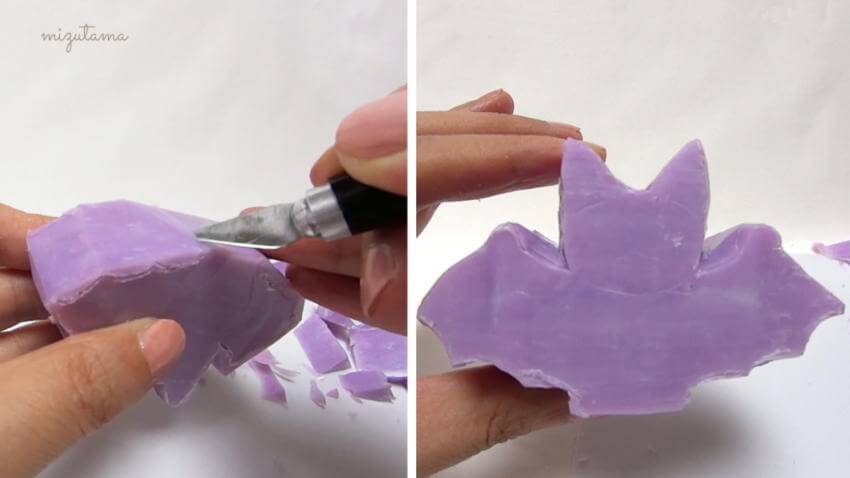
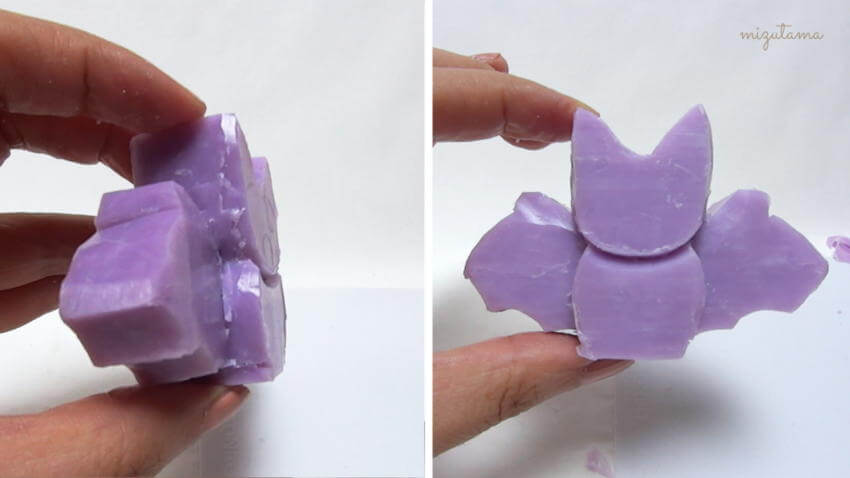
1.4 Cut off the unwanted soap with a craft knife.
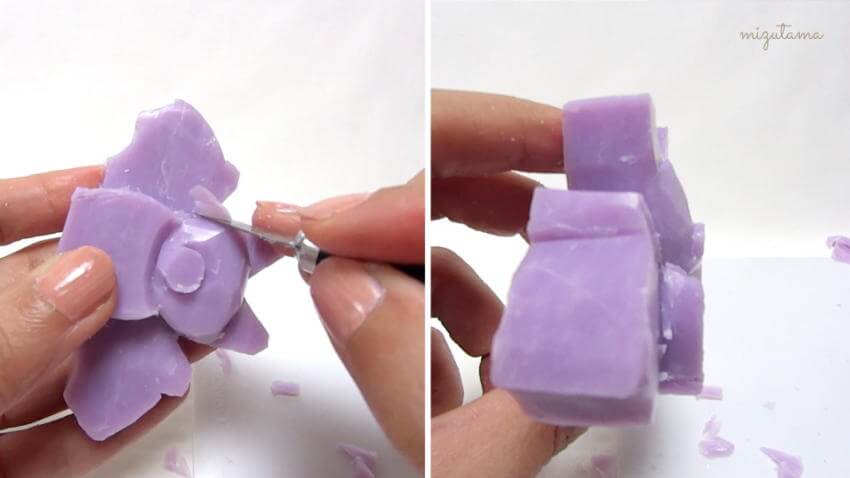
1.5 Cut off the soap between the face and the body.
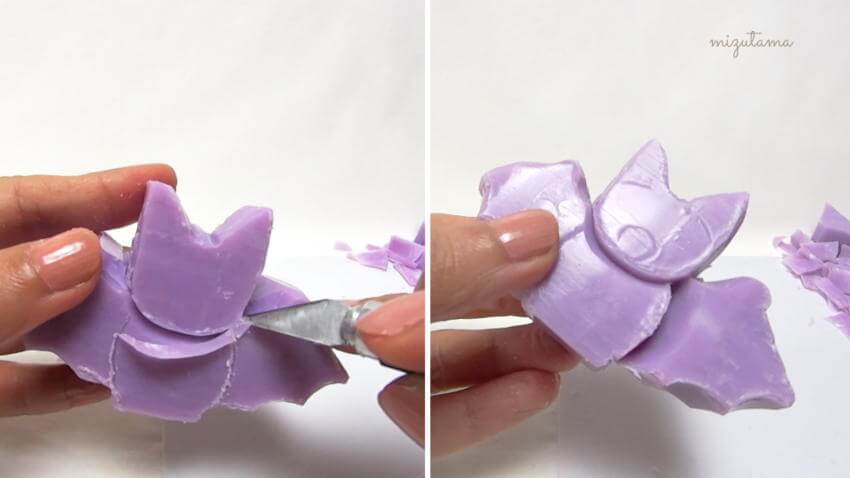
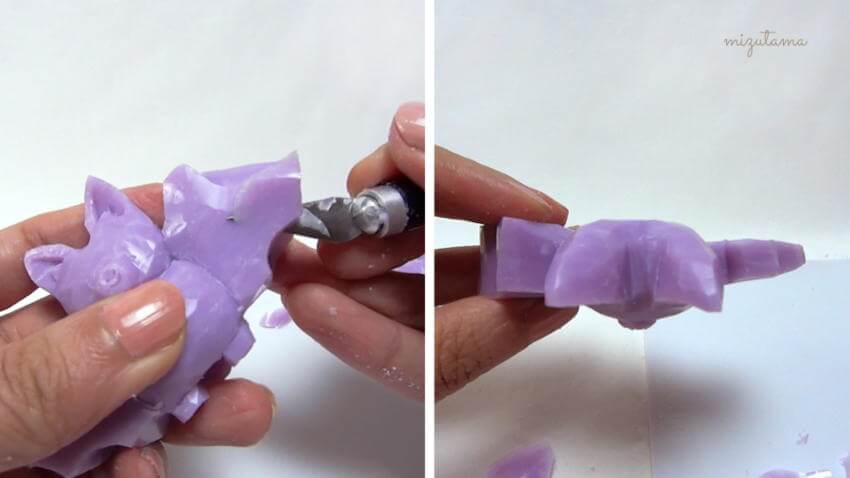
1.6 Cut off the top of the bat wing.
1.7 Do the same to the other wing.
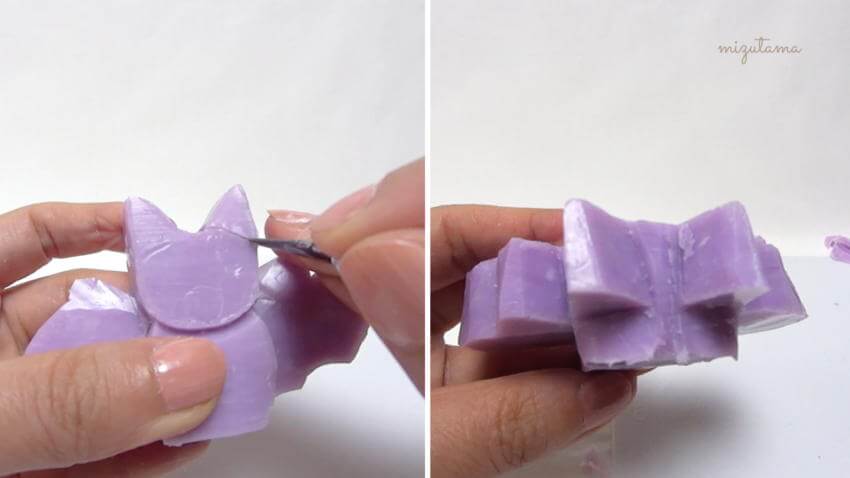
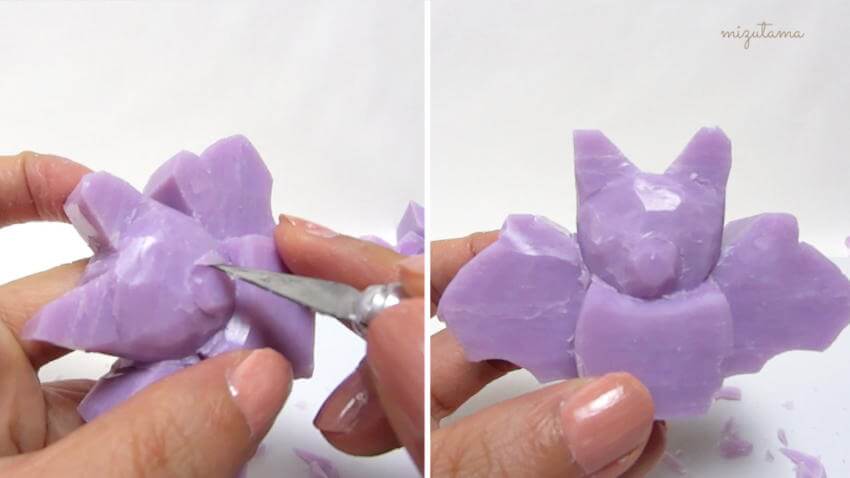
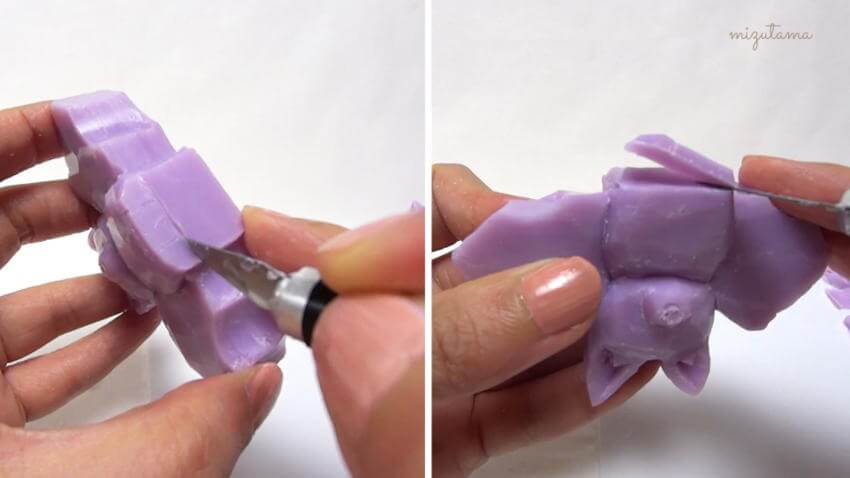
1.8 Cut off the front of the ears.
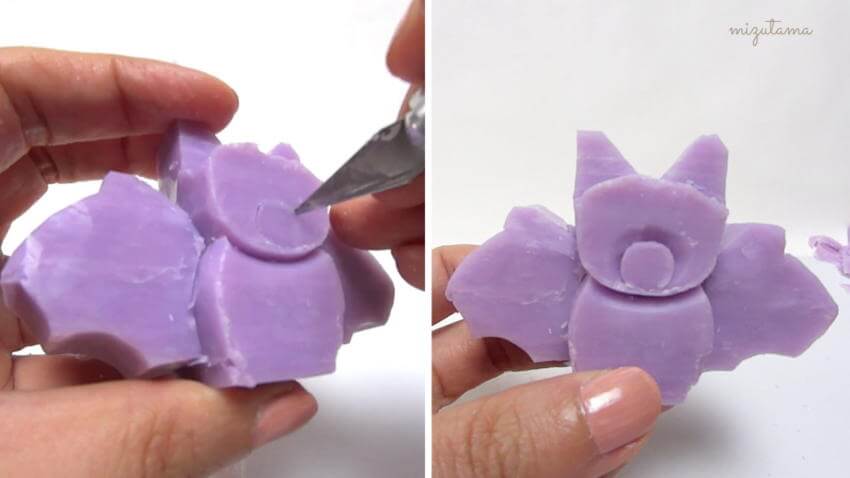
1.9 Carve a small cylinder shape for the nose.
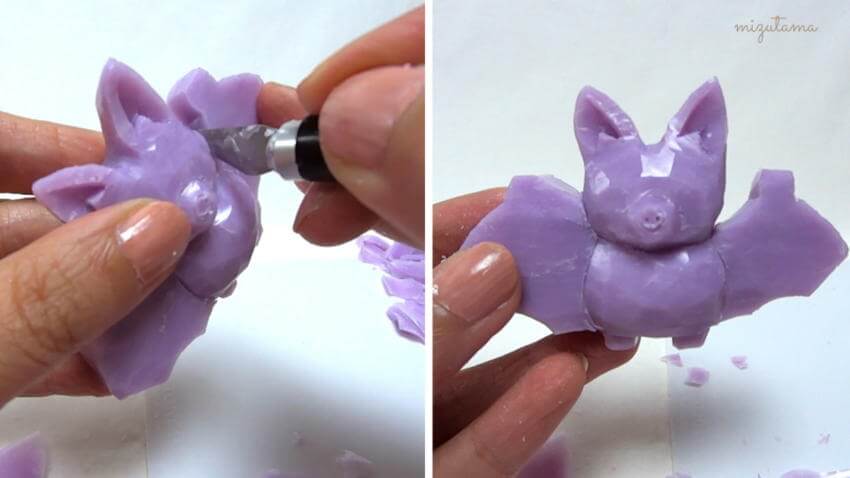
1.10 Trim around the nose and the edge of the face.
1.11 Trim the edge of the nose.
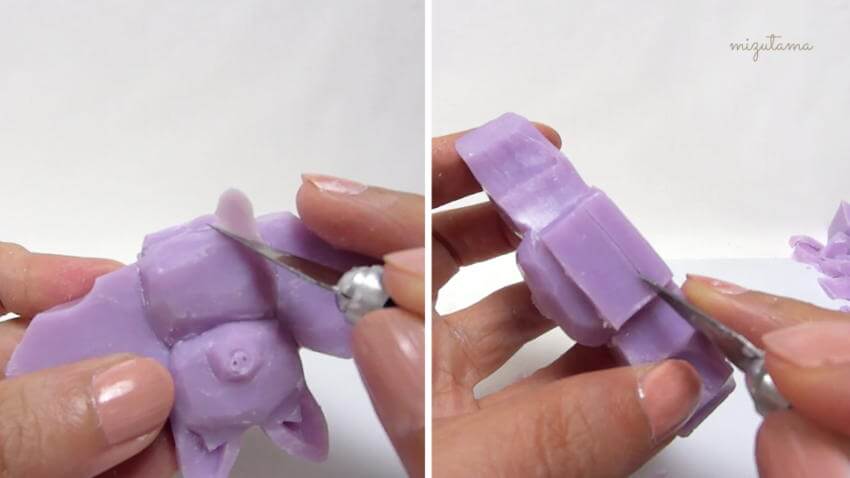
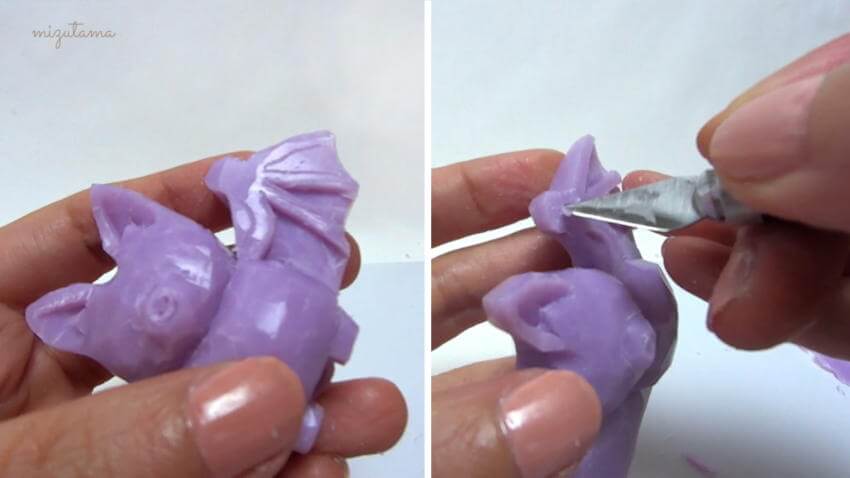
1.12 Trim the back of the ears and carve the insides of the ears.
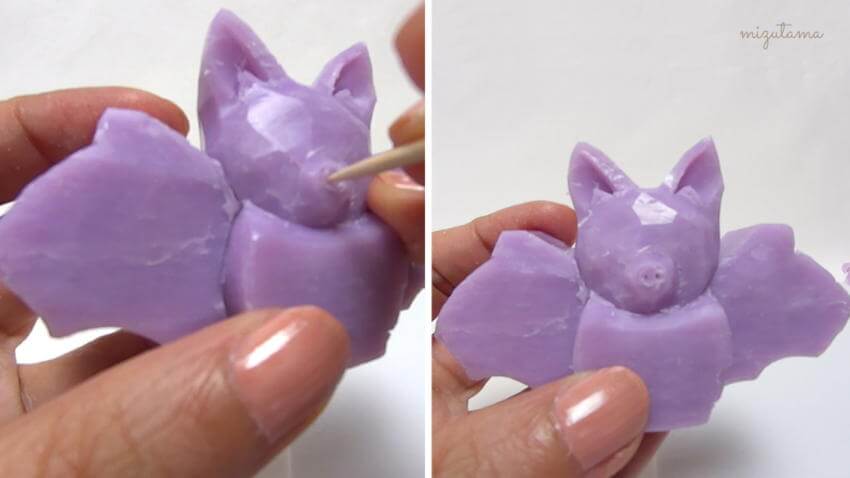
1.13 Make two nostrils with a toothpick.
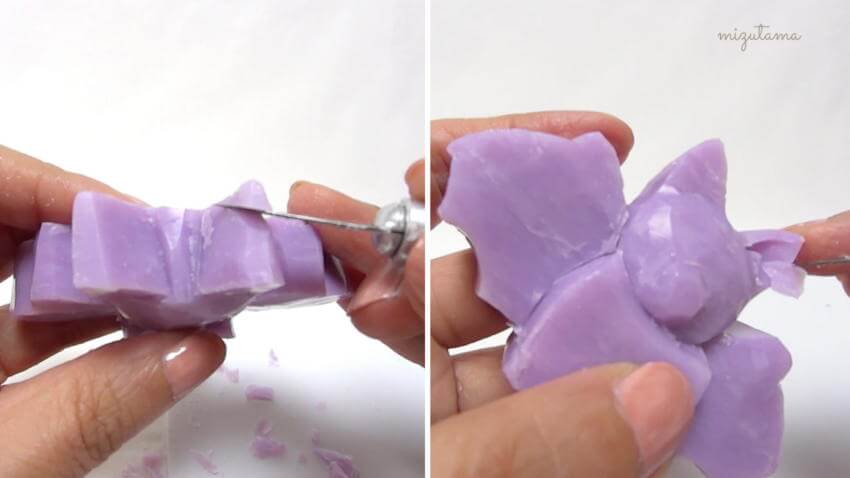
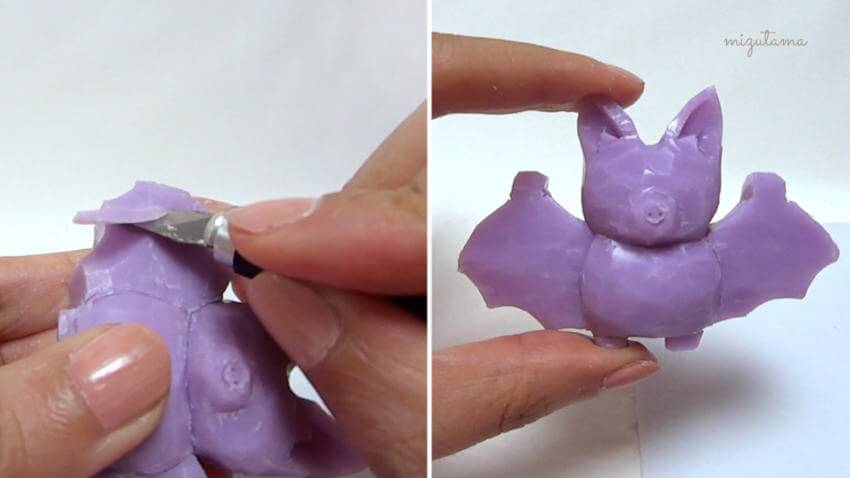
1.14 Trim the edges of the body.
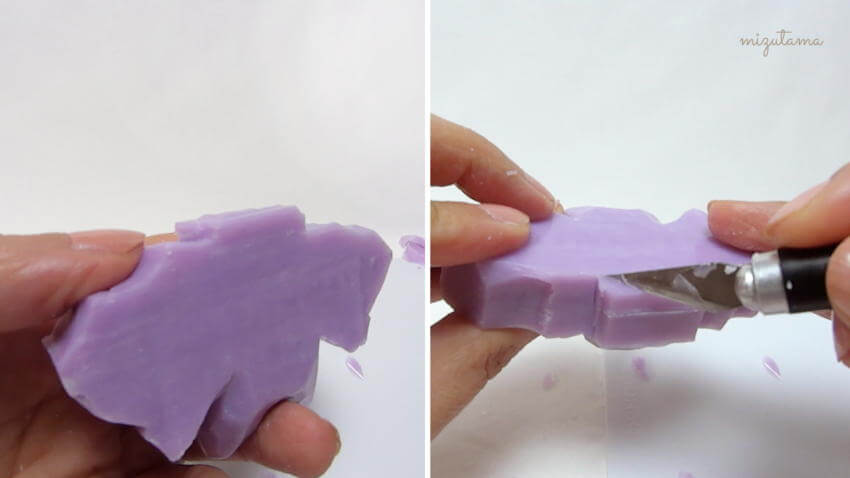
1.15 Cut off the front side of the bottom.
1.16 Trim the bottom of the front body.
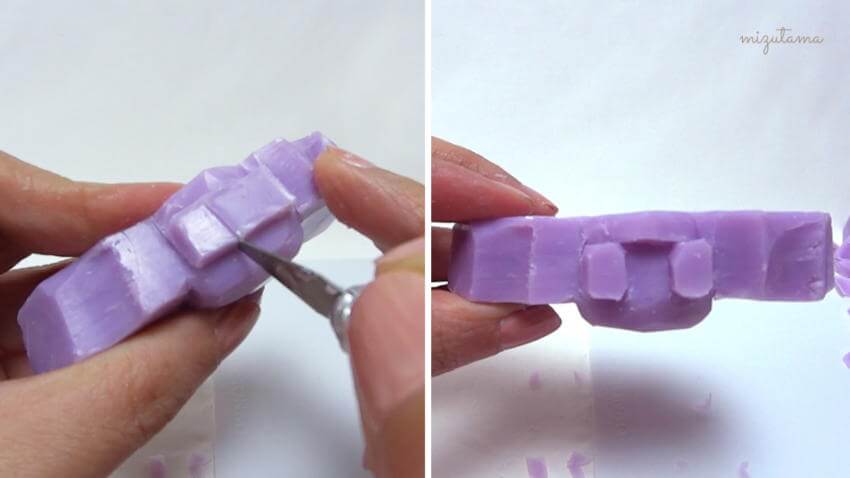
1.17 Carve a tail in the bottom of the back.
1.18 Cut off the soap between the legs and trim around the legs.
1.19 Carve the back of the bat.
1.20 Make the bat wing thin.
1.21 Cut off unwanted soap.
1.22 Repeat two previous steps for second wing.
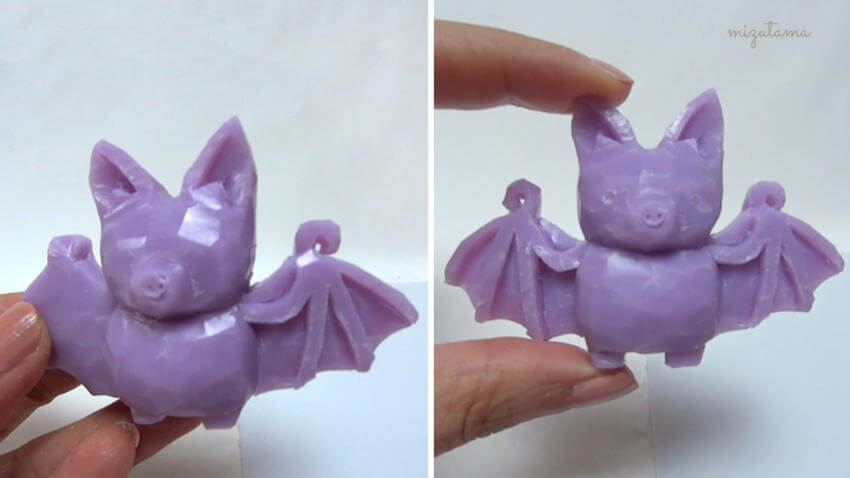
1.23 Carve the fingers and the arm.
1.24 Carve a small hole and a slit to create the thumb. Repeat last two steps to the other wing.
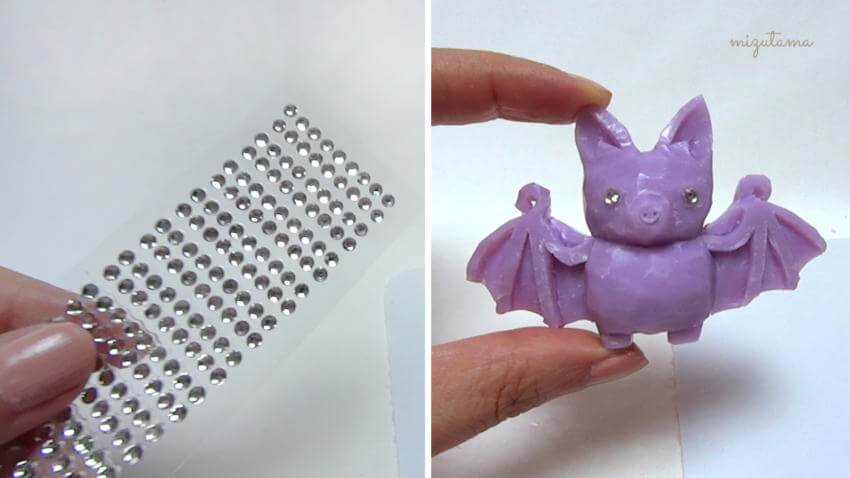
1.25 Place the gem stickers for eyes. You can use craft glue if you have non-sticky rhinestones.
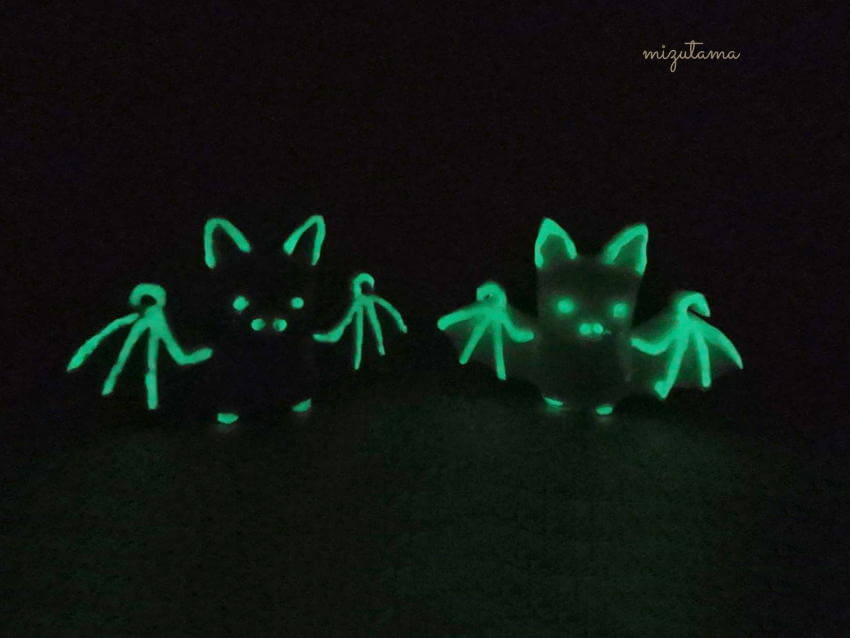
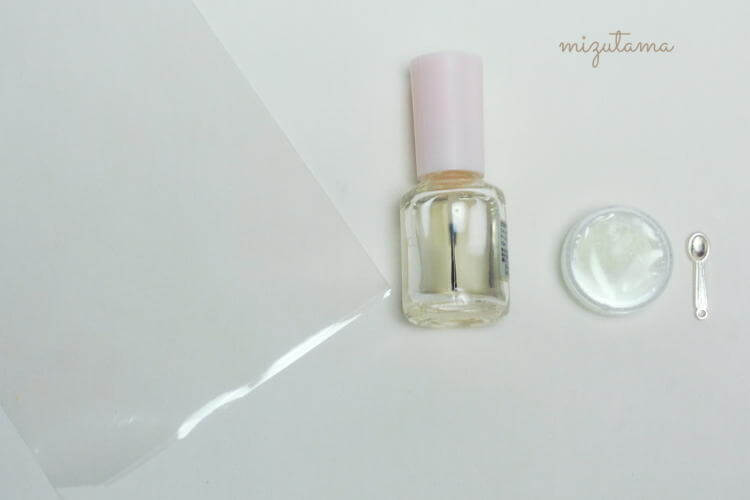
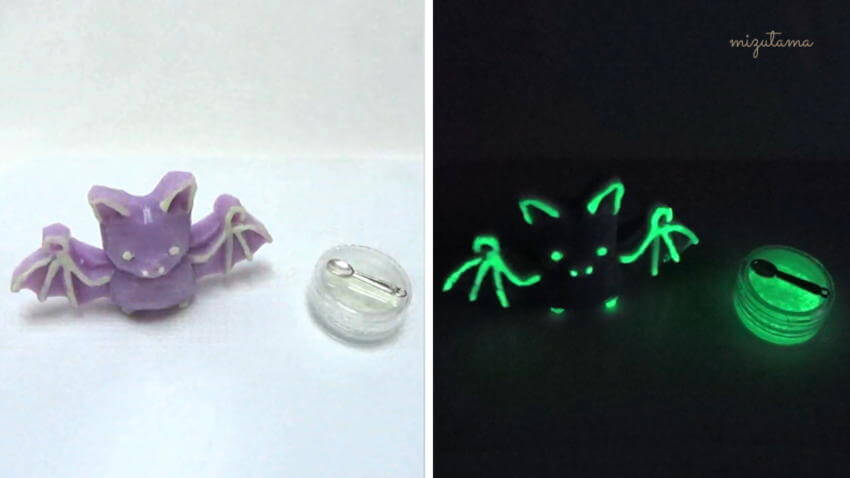
(Optional) Make your soap bat glow in the dark
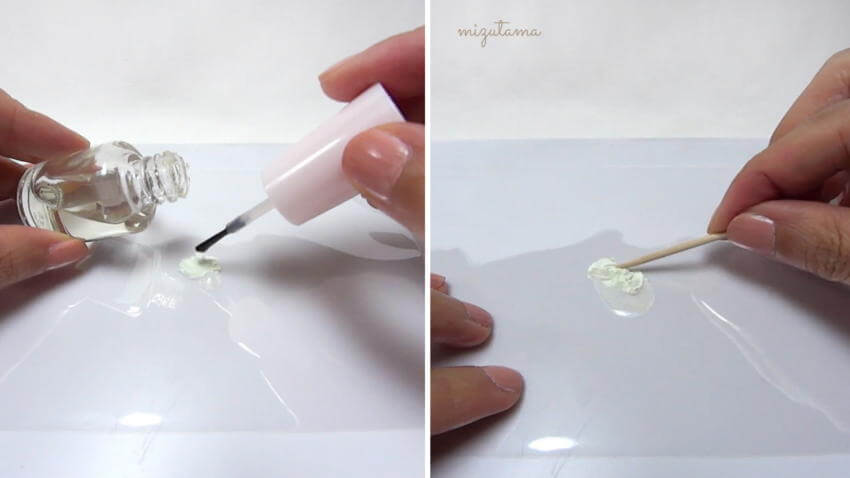
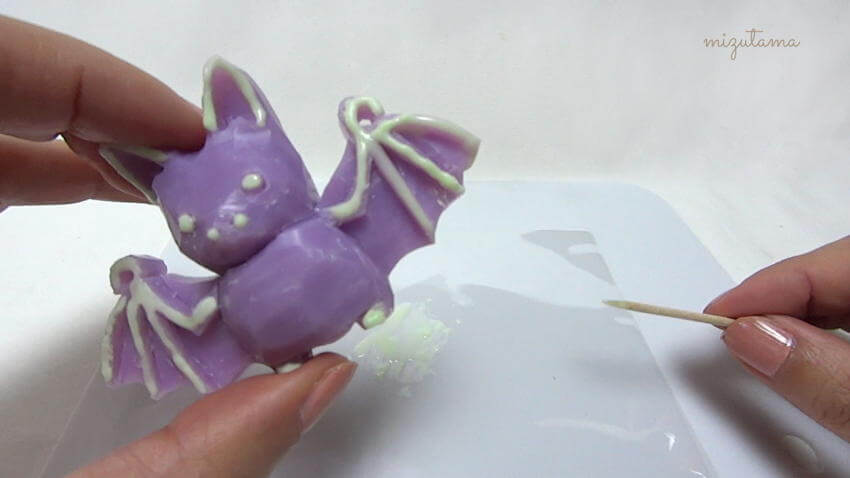
2.1 Mix the glowing pigment and the transparent nail polish in order to make your soap bat glow in the dark.
2.2 Apply the nail polish to the bat.
2.3 Let the nail polish dry. Done.
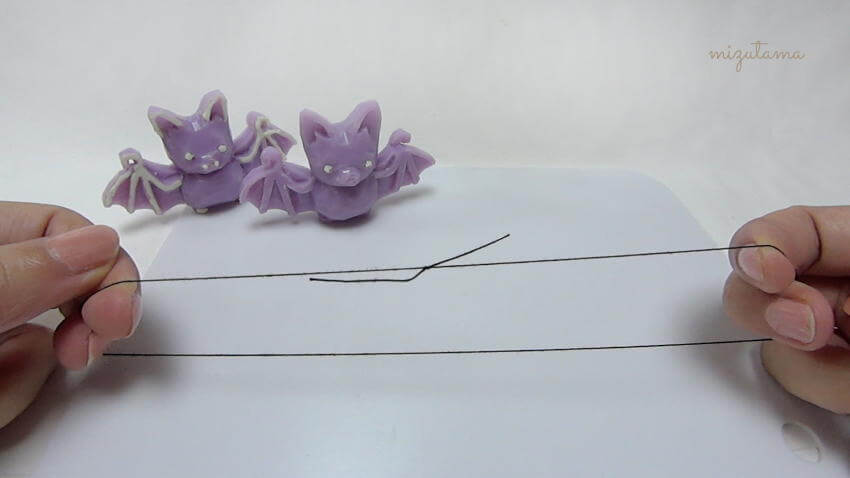
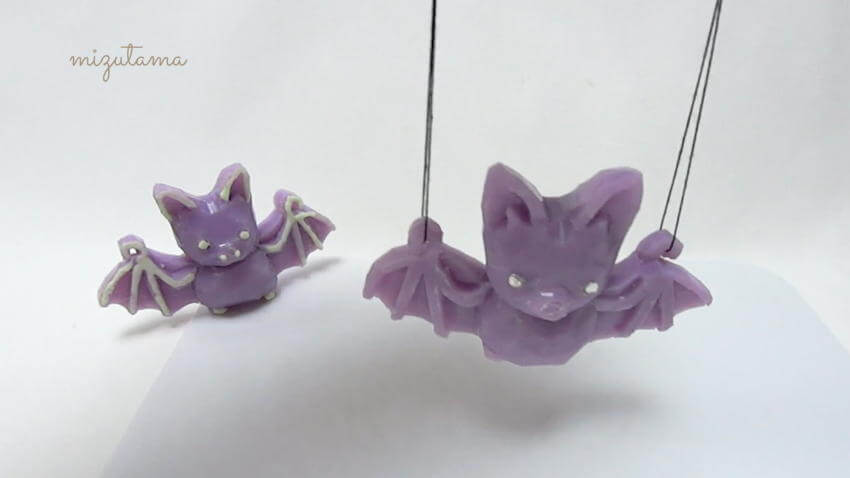
2.4 You can hang the bat with sewing thread, clear fishing line, thin wire, etc.
2.5 Hang your soap wherever you want. Done!