Size: 7 cm (2-1/4") x 3.8 cm (2-1/4") x 2.8 cm (1-1/8")
Weight: 45 g (1.59 oz)
🎞️
Instruction video
❔
Instructions
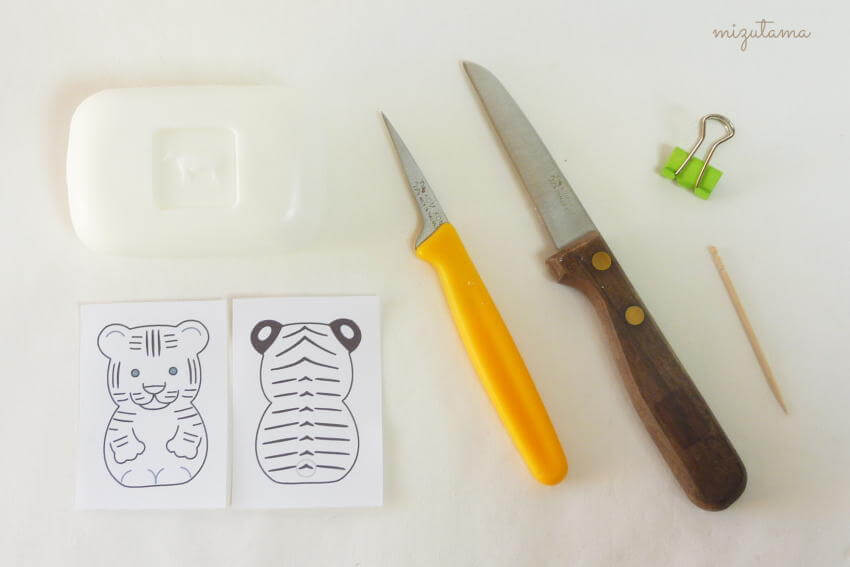
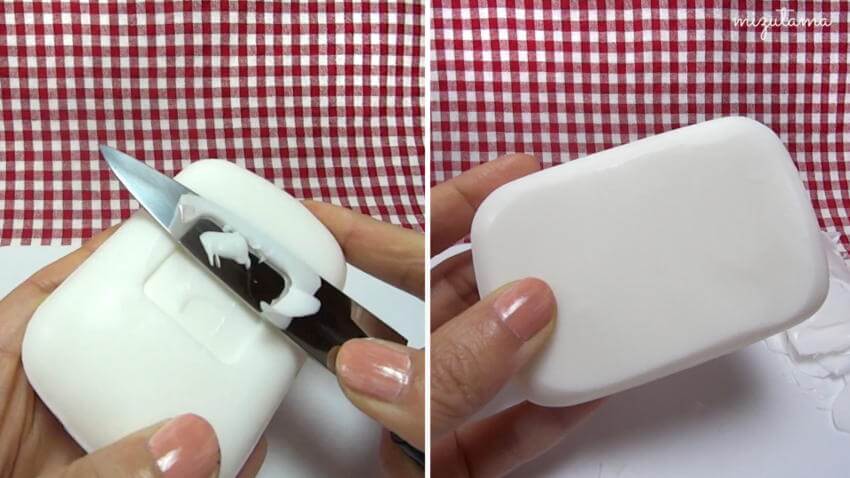
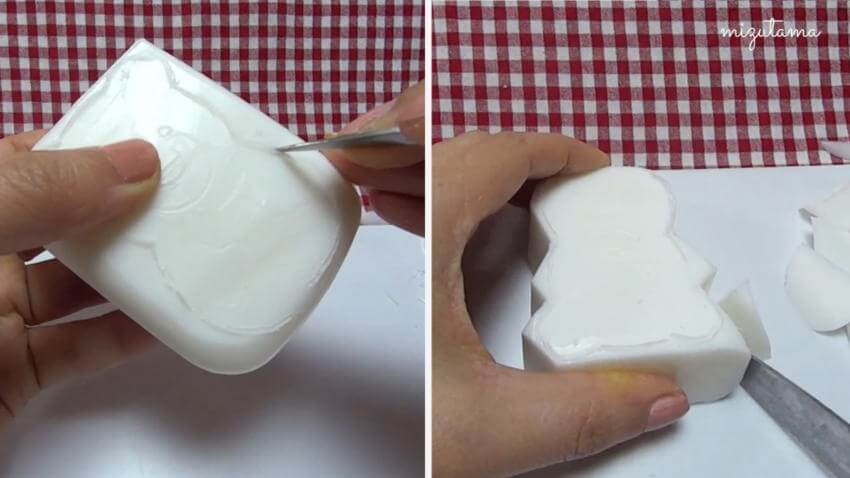
1. Thinly cut off the top and bottom of the soap to create flat surfaces.
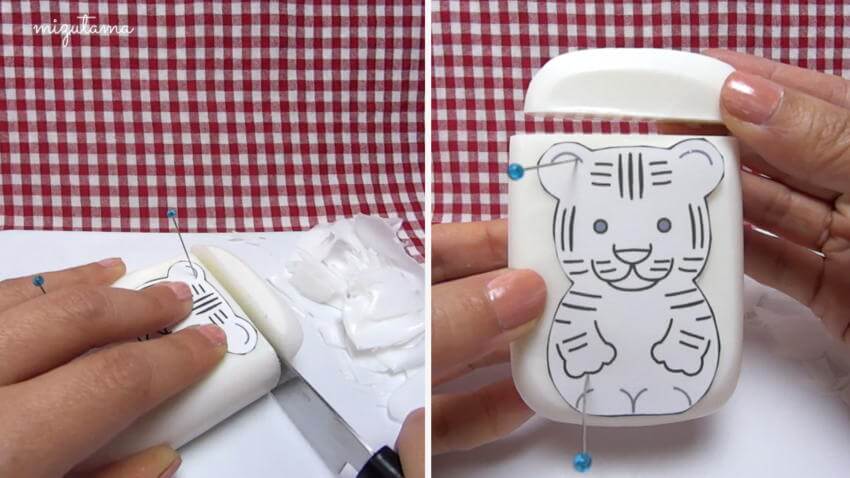
2. Place the tiger template onto the soap and cut off the excess soap. This small piece of soap will be later used for making a tail.
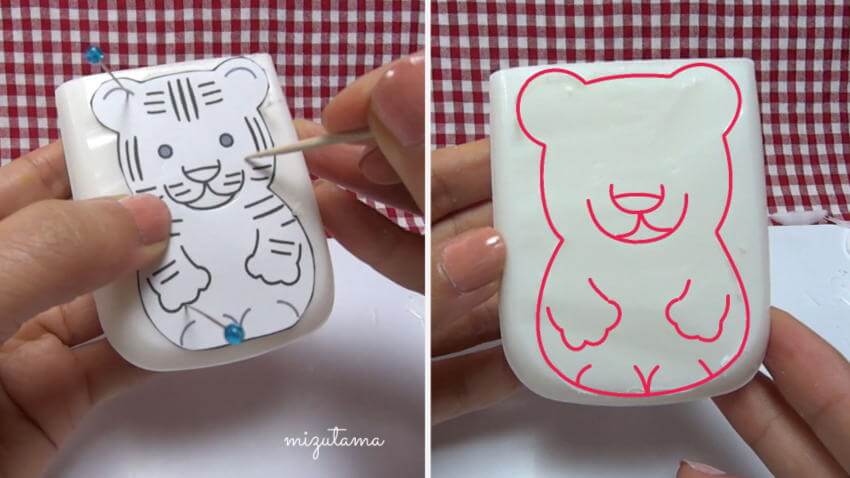
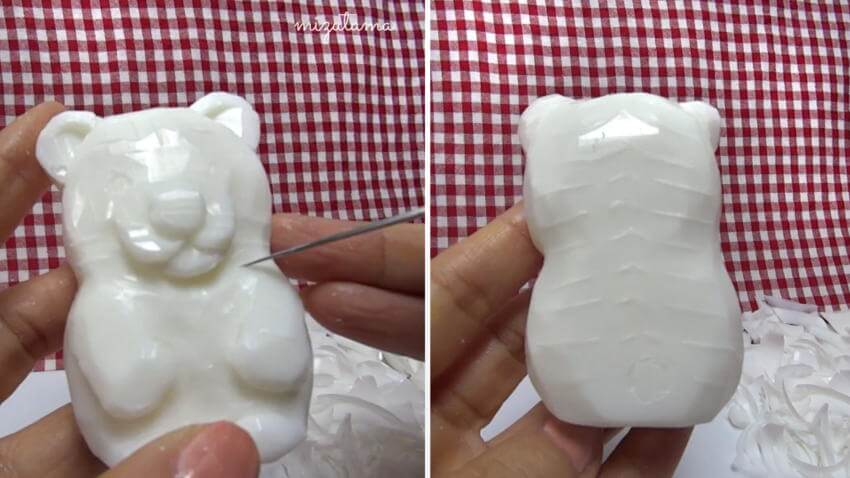
3. Trace the tiger shape onto the soap with a toothpick as shown in the picture.
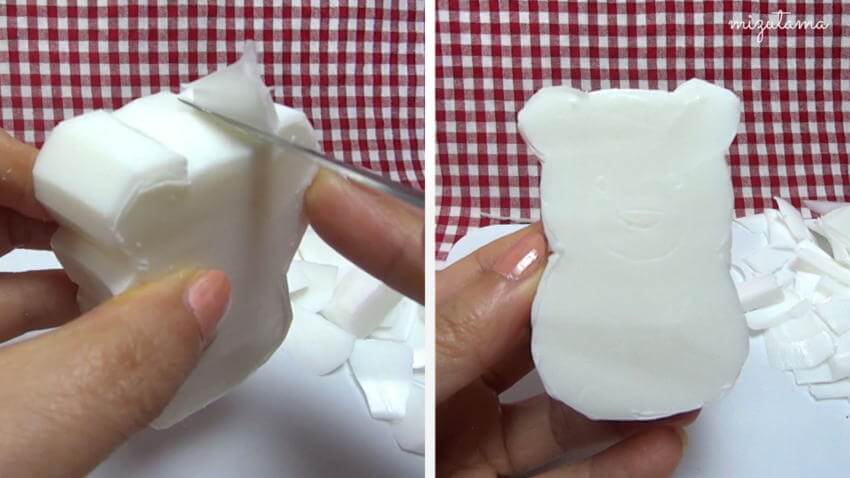
4. Lightly cut along the outline with a carving or exacto knife, then roughly cut the shape of the tiger out of the soap with a paring knife.
5. Cut off the excess soap with the carving knife.
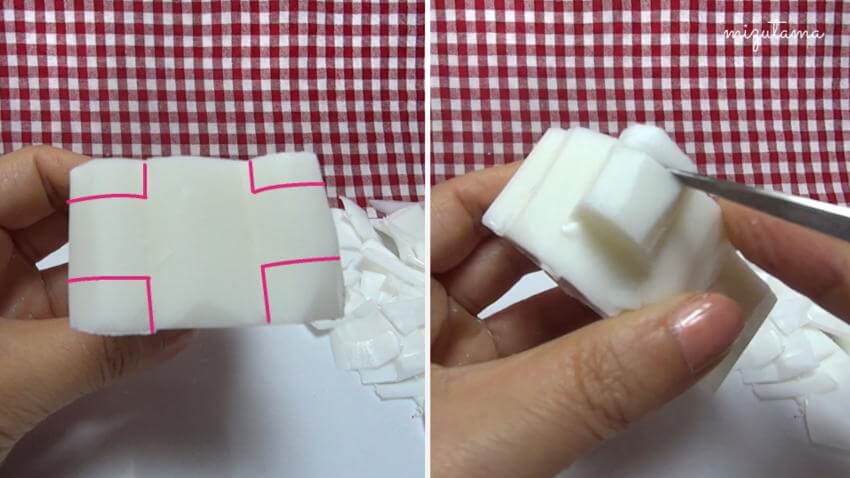
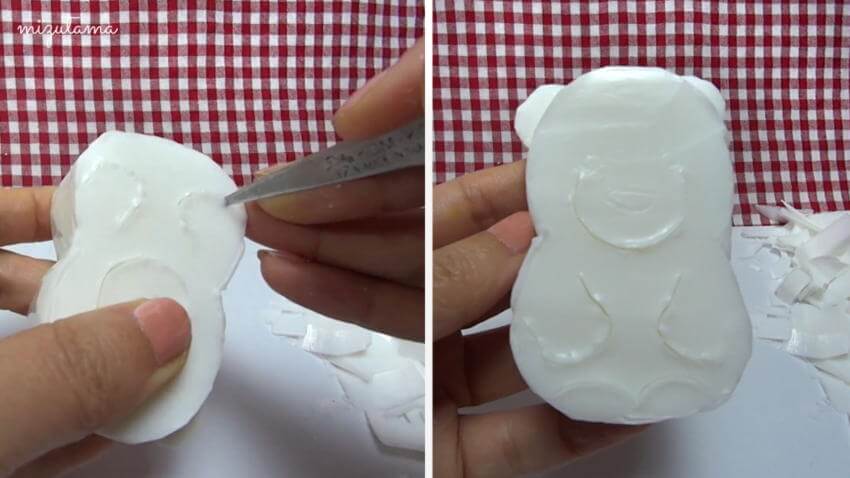
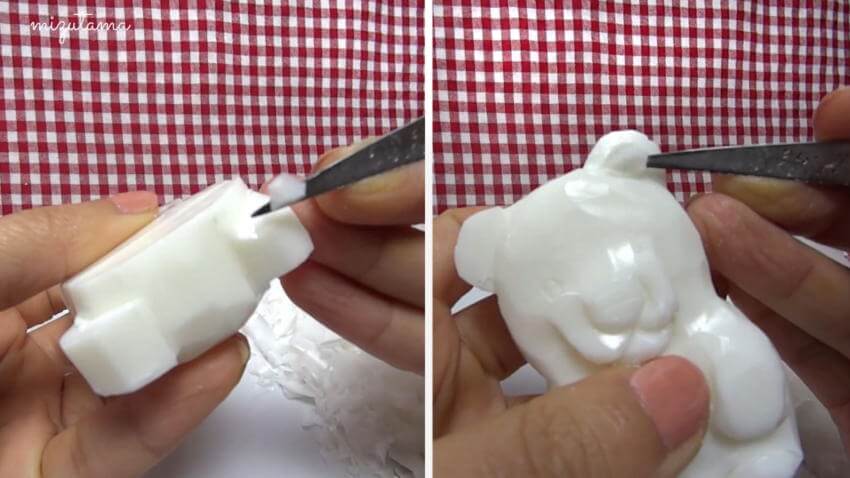
6. Cut off the excess part of the ears as shown in the pictures.
7. Cut the muzzle and legs along the outlines.
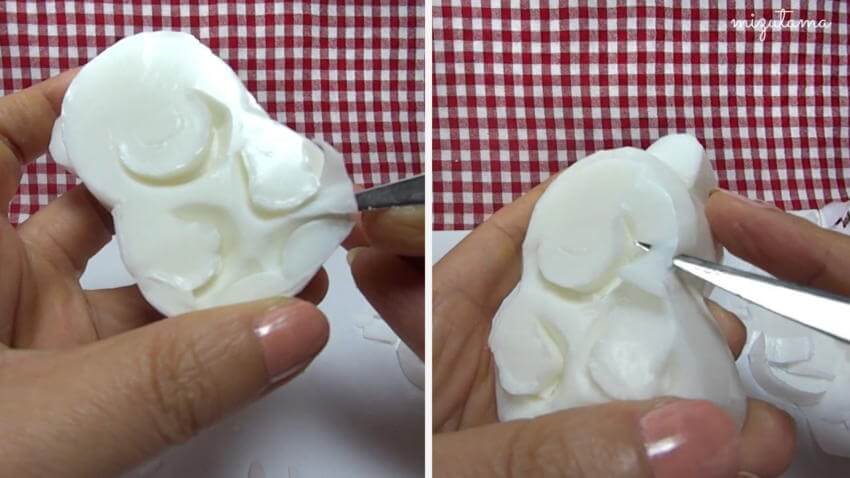
8. Cut off the soap around the muzzle and legs, and trim the edge of the body and the face.
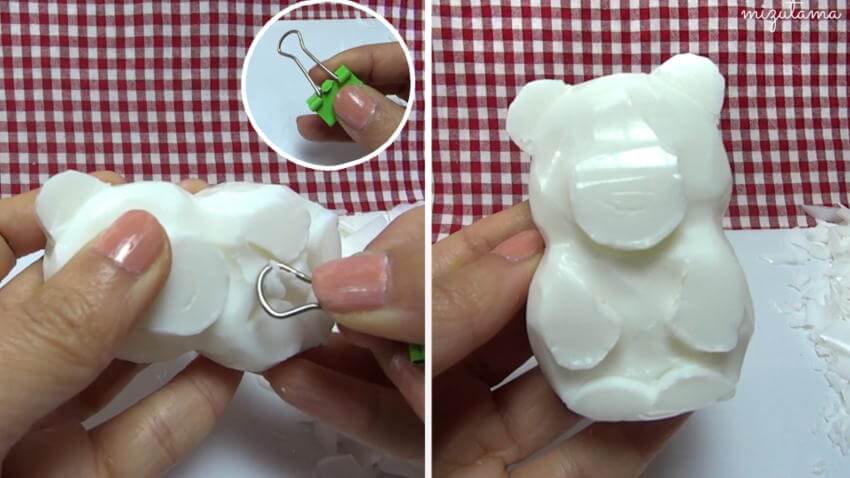
9. Scoop out the soap between the legs with a binder clip.
10. Trim the edges of the legs. Carve the nose and the mouth.
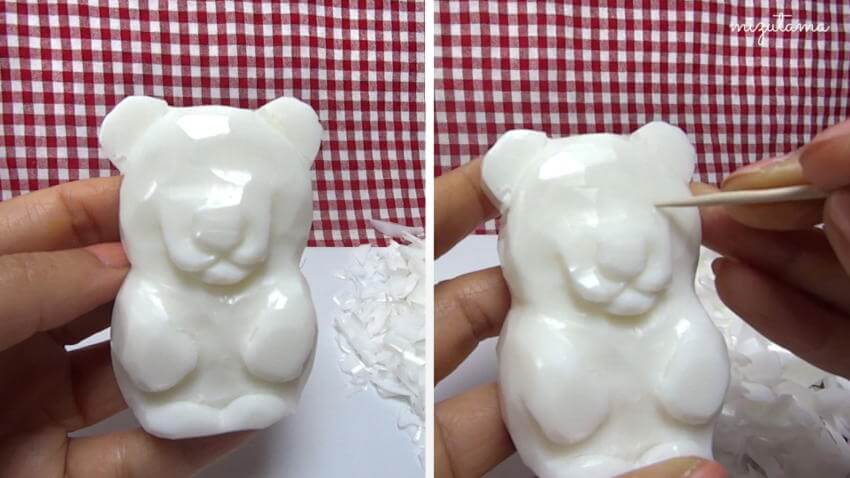
11. Draw the eyes with a toothpick.
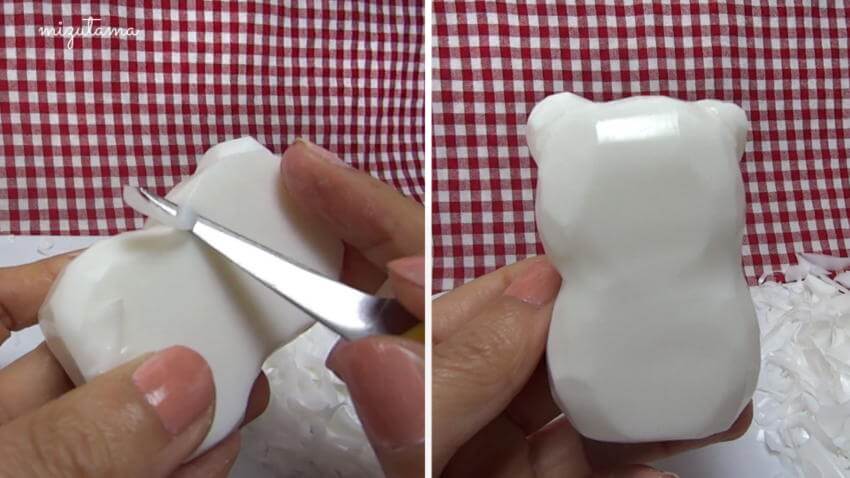
12. Trim and shape the ears, and carve an indent in each ear.
13. Trim the edge of the back.
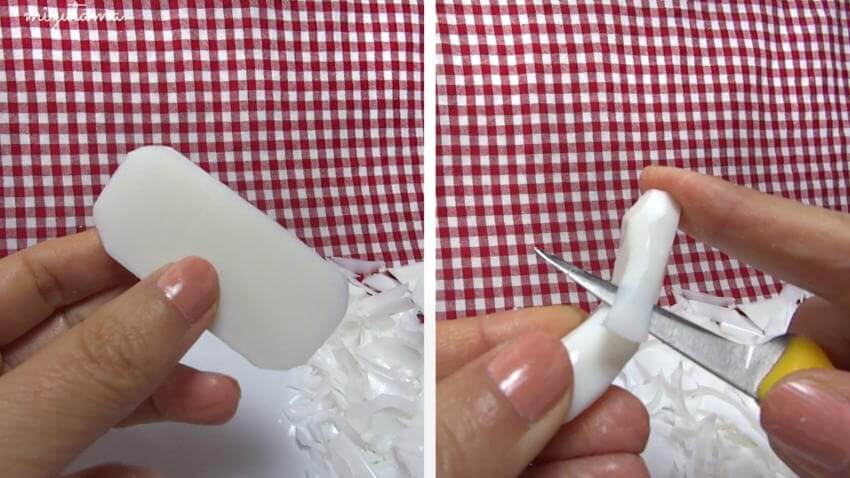
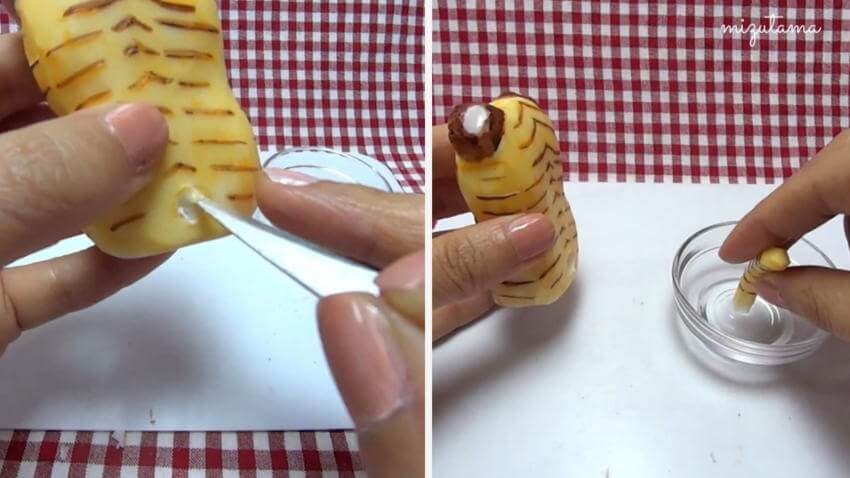
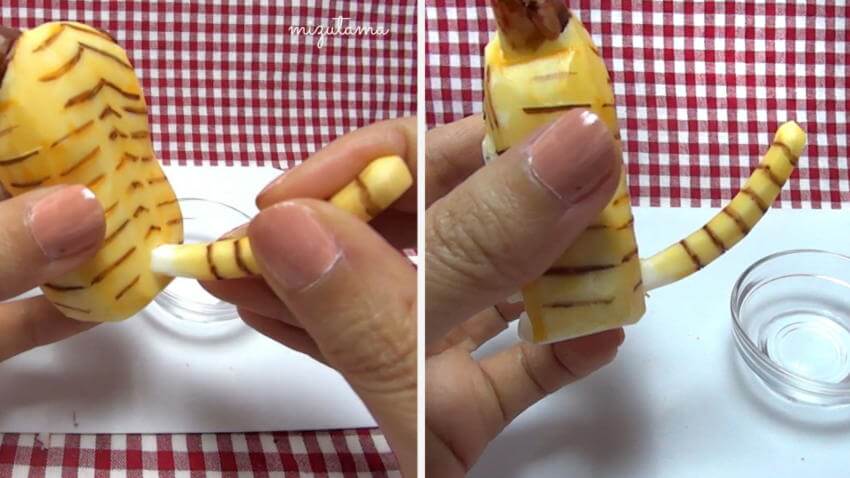
14. Using the small piece of soap from step 2, trim and shape it into a tail.
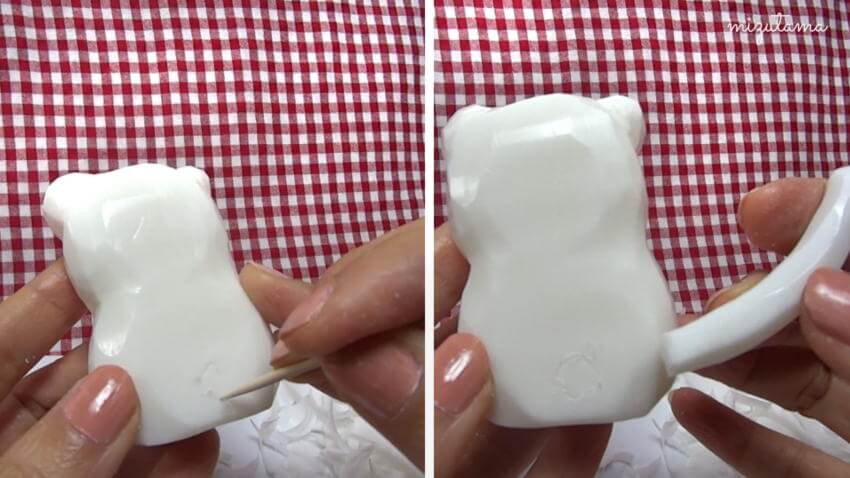
15. Draw a small circle in the back.
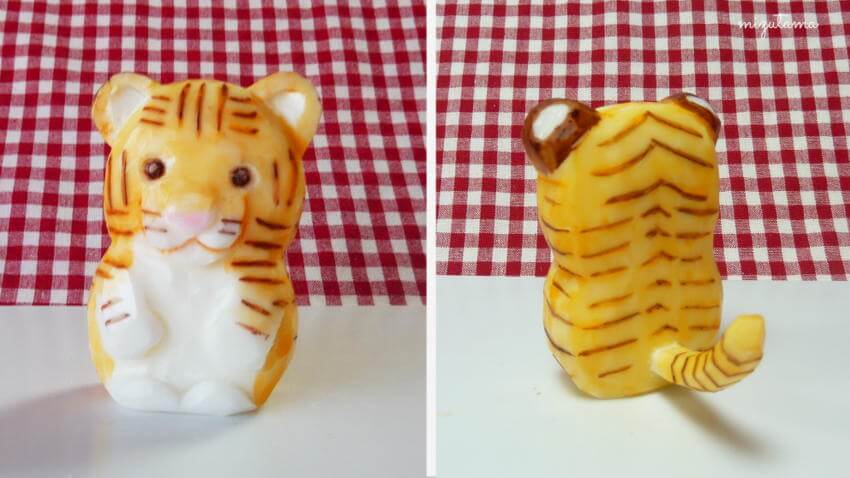
16. Draw tiger patterns with the tip of the knife.
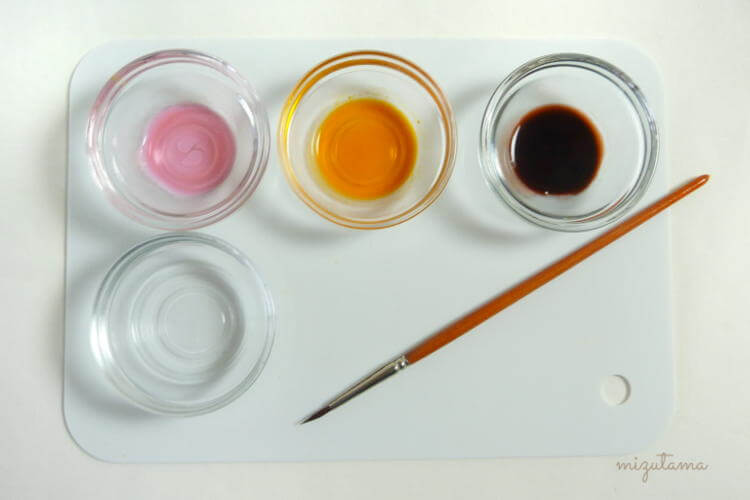
17. Paint the soap tiger with food coloring. Let the tiger dry.
18. Paint the back of the ears in dark brown or black. Then thinly cut off the ears to create white parts.
19. Carve a small circular hole in the back.
20. Add a bit of water to the tip of the tail, and attach it to the hole. Finished!
21. (Optional) You can carve a tiny dot in each eye to create a white part or use plastic eyes.
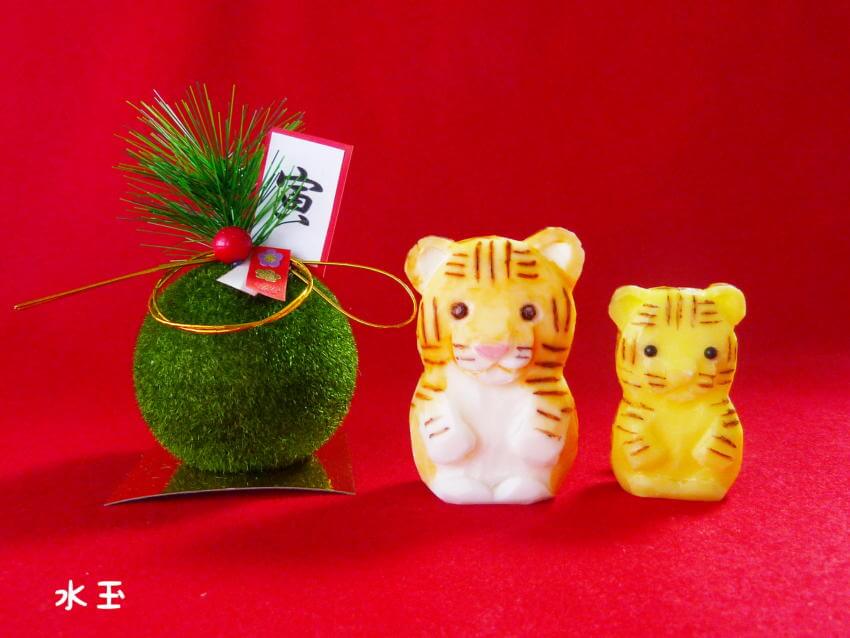
✨
Did you know?
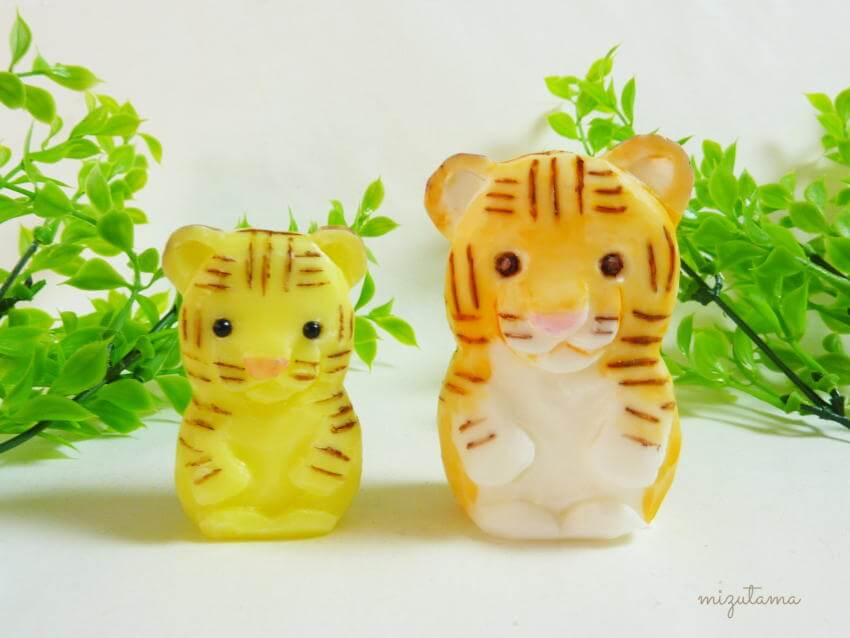
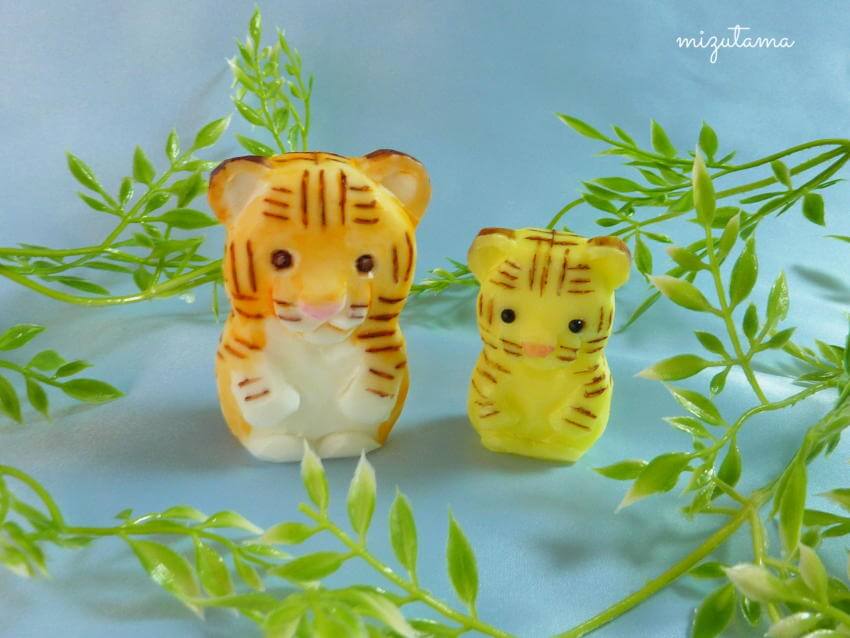
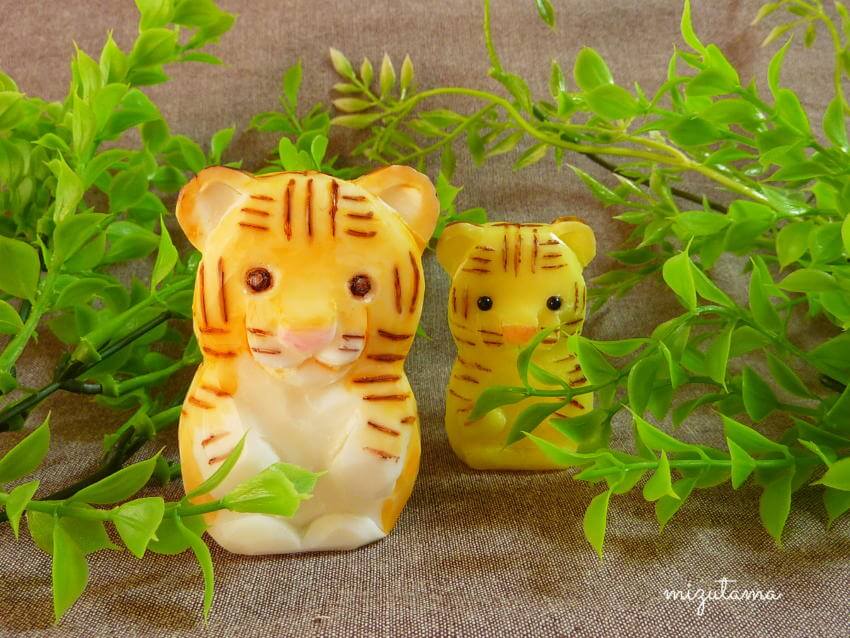
2022 is the Year of the Tiger according to Japanese zodiac. I made them as new year decorations!